
POCKET SURVIVAL PAK™
by Doug Ritter™
| | Adventure® Medical Kits POCKET SURVIVAL PAK™ by Doug Ritter™ |
|
The Rescue Flash™ Signal Mirror is constructed of virtually unbreakable Lexan® polycarbonate with an accurate mil-spec style retro-reflective aiming aid to allow one-handed use. In testing it was visible at distances exceeding 20 miles and flashed an attention-getting signal at 15 miles Pseudo "signal" mirrors are a signal mirror in name only. They have no retro-reflective aiming aid, being equipped either with an ineffective aiming hole or aiming mechanism or nothing at all. They require two hands to aim and at best it can be very tiring to hold up the second aiming arm for long periods. (Images and text © 2004 Douglas S. Ritter - All rights reserved.) | 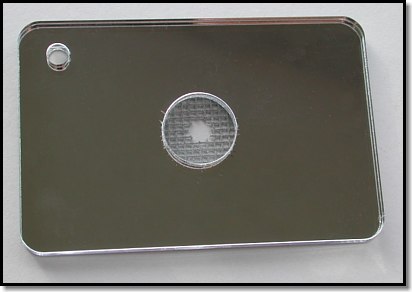 |
|
On the back of the Rescue Flash™ Signal Mirror are simple instructions for use, black text on a high-contrast yellow background for improved visibility in adverse conditions and sandwiched between layers of Lexan® polycarbonate for protection. It is always better to practice with a tool before you need to use it and this is even more important when you might have to use it in an emergency. We encourage you to practice with your Rescue Flash™ Signal Mirror. Be cautious, however, as the bright flash can be blinding and could cause an accident if flashed inappropriately. Practice by aiming only at inanimate objects. Here we will explain in further detail and with illustrations how to use the Rescue Flash™ Signal Mirror. | 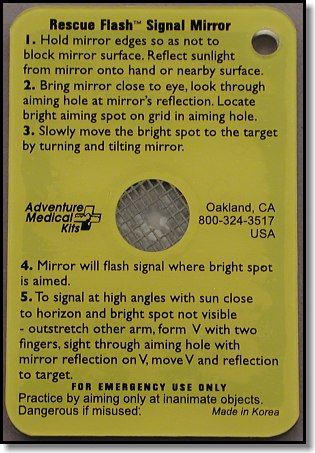 |
|
You must remove the protective covering from the face of the Rescue Flash™ Signal Mirror. This covering is opaque so that it is obvious it is in place and the mirror cannot be aimed until it is removed. When practicing, and even in actual use when possible, place this cover on another smooth surface, such as some window glass or metal, so that it will stay clean and can be reinstalled on the mirror face after use. While the Lexan® polycarbonate is extremely tough, it can be scratched relatively easily. Protect the face of the mirror from scratches as best you can in use or during transport. While a few scratches won't have any real effect, scratches covering larger areas could significantly reduce reflectivity with commensurate reduction in range and signaling capability. | 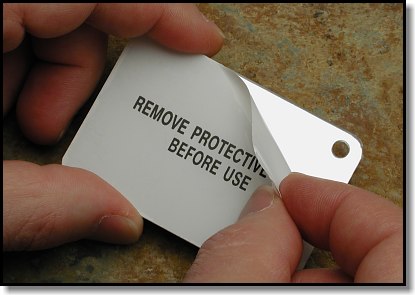 |
|
It is always good practice to attach a lanyard to all survival gear, especially so in situations where they might easily be dropped and lost. This would include use around water or in steep and unforgiving terrain. Use the nylon cord in your POCKET SURVIVAL PAK™ or something similar to make a lanyard. If you make a neck lanyard, remember that if it is loose, it can as easily slip off when your head is lowered as it was to slip on in the first place. Often it is better to simply attach one end to your clothing through a button hole or using a safety pin. | 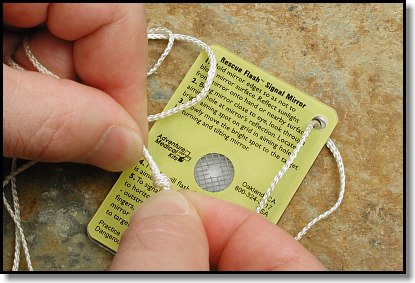 |
|
Hold the mirror edges so as not to block any of the reflective surface. With only 6 square inches (14 sq. cm), less the aiming hole and lanyard hole, even a fingertip in the way can noticeably reduce the available signaling surface resulting in reduced range or signaling effect. Care should be taken to keep dirt and fingerprints from the mirror surface. Face the sun (or bright moon) and reflect light from the mirror surface onto your hand or a nearby surface. | 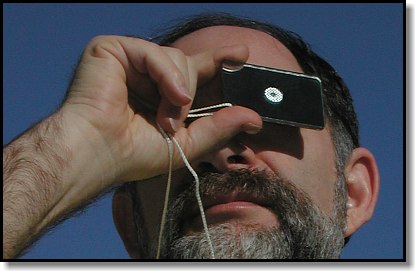 |
|
Bring the mirror close to your eye, tyically 1 inch (2.5 cm) or closer, or just in front of your glasses. Looking through the aiming hole, locate the mirror's reflection on your hand or the nearby surface. You will see a bright spot, sometimes characterized as a "fireball," within the mesh in the aimer. | 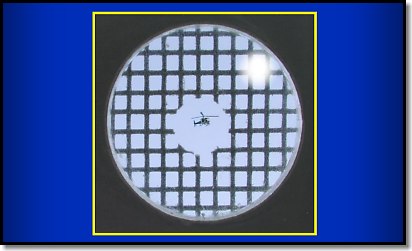 |
|
By carefully turning and tilting the mirror, locate your target through the clear center of the aimer while still keeping the bright aiming spot within the mesh. If you lose the aiming spot, stop and start over. It gets much easier with practice. | 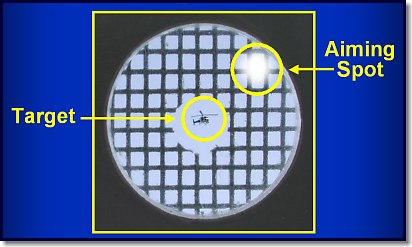 |
|
Continue turning and tilting the mirror to bring the target and the bright aiming spot towards each other within the mesh portion of the aimer. The bright aiming spot is only visible through the retro-reflective mesh. You cannot simply move the spot to the target in the clear center. | 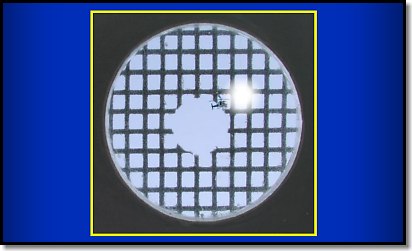 |
|
When the bright aiming spot covers the target, you will be flashing a signal to the target. Very little movement is required to create a flash, normally this occurs simply by attempting to keep the target covered by the spot, but wiggling the mirror very slightly to move the bright aiming spot across the target will provide a more definite flash. With moving targets especially, such as an aircraft moving across the sky, it is best to move the mirror side to side, not up and down. If no target is in sight, the mirror has sufficient range to make it worth the effort to flash the horizon. Rescues have been made by aircraft occupants noticing mirror flashes beyond visual range. When doing so, flash the mirror on a particular spot on the horizon for two minutes, so that you will more likely generate multiple flashes that are less likely to be disregarded. Then, move your aiming point a few degrees and try again. If you happen to know that aircraft generally fly a track across a particular segment of the horizon or that hikers are likely to cross a particular ridge, concentrate on that area. Use any local knowldge to your advantage. | 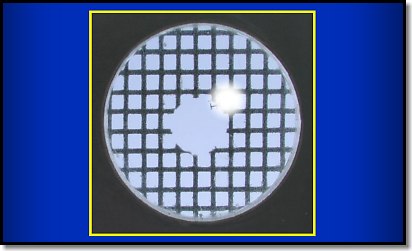 |
|
The retro-reflective aimer has physical limitations and will not work effectively at high angles away from the sun. In such cases, the two-handed aiming method is required. Hold the mirror at your eye and look through the aimer or over the top of the mirror; outstretch you other arm and form a V with two fingers. Sight through the aiming hole or over the top of the mirror with the mirror reflection visible on the V. Carefully turn and tilt the mirror to move the V and the reflection to the target. Lower the V so that the reflection touches only the tip of the fingers for maximum signaling performance. This signaling method will work with any reflective surface (make-up mirror, CD-ROM, shinney piece of metal, hologram on credit card, etc) to create an improvised signal mirror. If there are multiple members of you party, have them use improvised mirrors if they do not have their own signal mirror. | 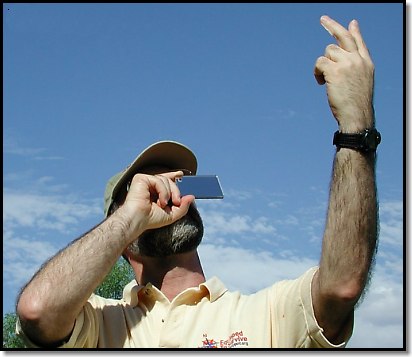 |
|
| SELECT AND USE OUTDOORS AND SURVIVAL EQUIPMENT, SUPPLIES AND TECHNIQUES AT YOUR OWN RISK. Please review the full WARNING & DISCLAIMER about information on this site. |
Email Doug Ritter
URL:
http://www.DougRitter.com/psp_rescueflash.htm
First Published on: May 5, 2004
|